You spent thousands on the latest MacBook and are perplexed at it running slow. Then, my friend, you are at the right place. We will explore ten reasons as to why you aren’t getting bang for your buck.
Alongside the reasons, we will talk about easy solutions to make sure that your MacBooks runs as smooth as butter.
The easiest one is using CleanMyMac software. It clears up RAM, handles maintenance scripts, and allows other tweaks to restore your Mac’s speed. Now, let’s delve into all the problems and solutions in detail.
In this guide, we are going to share the fixes we’ve discovered along the way, and you are going to learn:
- The 4 main reasons why a MacBook can run slow.
- Solutions to fix your slow Macbook and make it fast again.
- Bonus tips to mitigate the risk of future slow-downs.
Besides MacBook Pros, the tips below should also apply to other types of Macs such as iMac, MacBook Air, Mac Pro/Mini, etc. Use the Table of Contents below for better navigation.
Why is My Macbook Pro so Slow?

Whether you own an old MacBook Pro, or a shiny new 16-inch Touch Bar MacBook Pro with Apple M1 Max Chip, over time it can run slowly. There could be so many causes, but in general, they all fall into the following four categories.
- Personal Habits. If you keep your Mac running all the time, let too many unused apps join the fun on startup, or multitask with loads of heavy applications open — more often than not, your Mac will hang.
- macOS System. A newer macOS usually performs better than an old one, but no system is perfect. You may experience firmware or permission issues that impede performance as well.
- Software Issues. Apps, whether pre-installed or third-party ones downloaded elsewhere, can consume lots of system resources when used improperly, which eventually will slow down a Mac.
- Outdated Hardware. Every piece of hardware has a lifespan; your Macbook is no exception. An outdated hard drive or lack of RAM can be the bottleneck of your machine.
Note: If your MacBook Pro is slow only after updating to the latest macOS version (i.e. macOS 12 Monterey), the best fix would be restarting your machine several times since the new macOS needs time to re-index or update data saved in the disk drive. For example, Photos can take a while to update the entire picture library; Spotlight re-indexing tends to be time-consuming as well. Learn more from this post: Quick Fixes for a Slow Mac after macOS Monterey Update
Moving on… The Solutions!
Now that you’ve learned the reasons behind a slow mac, what should you do to fix it? We break down the solutions into two categories:
- The Manual Methods: best for those who are tech-savvy and don’t mind taking the time to do so. We list a number of things you can do manually to fix your slow Mac.
- The Quick Technique: best for beginners or those of you who don’t have time to implement manual fixes. We recommend using CleanMyMac X to scan your Mac and fix all issues the app finds.

Note though, the solutions we suggest below only work when your Mac can boot up normally. If it cannot, or you hear strange sounds coming from the machine (particularly from the internal Mac hard drive), contact Apple support or schedule an appointment with a Genius Bar in your area.
How to Fix a Slow Macbook Pro: The Manual Methods (4-6 hours)
The methods introduced below are the best manual fixes we have explored. The order is based on a combination of estimated time required and expected effectiveness after implementation. They are, however, by no means the only solutions, and you don’t have to complete all the methods as it’s very unlikely you’ll be able to. Meanwhile, read this checklist on how to speed up Macbook Pro.
Method 1: Manage login items to tune startup times
- Time: 5-10 minutes
- Effectiveness: Low-Moderate
When to use: your MacBook Pro runs extremely slow on startup.
Why it helps: disabling login items (auto-run applications or services) you rarely use helps your Mac better allocate system resources to load the processes you do use, you’ll reach the login or desktop screen more quickly.
How to do: follow the steps in this YouTube video.
Method 2: Clear off cluttered Desktop items & Dashboard widgets
- Time: 20-30 minutes
- Effectiveness: Moderate
When to use: your Macbook Pro takes a bit longer to load the first screen after startup.
Why it helps: because macOS treats each desktop item (be it a file, a Dock application, or a Dashboard widget) as a small task, it uses resources to load it when starting up. Reducing the number of such items can make the first screen show up quicker.
How to do:
- Keep fewer files on Mac desktop. Try to group those files you saved directly on desktop, put them into few folders, and if possible move them folders like Documents or Pictures.
- Remove unnecessary apps from the Dock. Move your mouse cursor to an app, right-click, select Options and click Remove from Dock.
- Clear unused Dashboard widgets. Go to Dashboard, press option button and move your cursor the widget you don’t want to show, click “x” on the upper left corner.
Method 3: Clean up hard drive to free up more disk space
- Time: 1-2 hours
- Effectiveness: High
When to use: your Macbook Pro is running out of space, and it slows down or freezes more frequently.
Why it helps: macOS utilizes free hard disk space as “virtual memory” in addition to RAM (Random Access Memory). If your MacBook Pro is running out of storage, that means little virtual memory can be used by the system if needed. This may cause your Mac to freeze more frequently — even when you just launch a few apps. In general, having at least 10% of free space can often prevent the problem from happening.
How to do: try the tricks below.
Waiting for your MacBook to stop lagging is frustrating, and this is where CleanMyMac comes in. This software prevents your MacBook from lagging by speed up your mac performance, and removing unnecessary plugins.
Additionally, CleanMyMac helps manage all the apps and extensions on a MacBook, deletes tracking cookies, and ensures that your apps remain updated.
- Empty Mac Trash bin.
- Clear web browser (Safari, Chrome, Firefox, etc.) files such as caches, history, plugins, temporary files, broken files, etc.
- Uninstall unused applications.
- Remove unused language packs on your Mac.
- Go to the “Movies” and “Pictures” folders, delete large or duplicate items you’ve already backed up. You can use Gemini 2 to find them more quickly.
- Go to the “Download” folder and get rid of items you don’t need.
- Transfer big files or folders to your external hard drive or another computer.
- And other ways you can think of to lighten your Mac hard drive. Lastly, never underestimated the probability of a large unknown file, for once I had accidentally recorded 8 hours of screencasting video. I didn’t know it until I ran Space Lens from CleanMyMac where I got to zoom in folders after folders to detect the large files.
Method 4: Verify and repair disk permissions with Disk Utility
- Time: 15 minutes
- Effectiveness: Moderate
Update: beginning with Operating System X El Capitan (including macOS Sierra), it’s no longer necessary to verify or repair permissions as Apple has made system file permissions to be automatically protected.
When to use: your Macbook has issues launching some applications, and doing so slows down your Mac.
Why it helps: corrupted or damaged file permissions can cause certain applications to run abnormally or unable to run at all, thus affecting the overall Mac’s performance. Matt from CNET brought his sluggish Mac back to health using this method. Note: it’s harmless to repair file permissions.
How to do: check out this YouTube video for a step-by-step guide.
Method 5: Lighten web browsers to improve Internet surfing

- Time: 20 minutes
- Effectiveness: Low-Moderate
When to use: your web browser (Safari, Chrome, or Firefox, etc.) just seems stubborn to load pages or becomes unresponsive.
Why it helps: web browsers are notorious for dragging down computer performance after extended use. By implementing the things below, you can expect a much smoother net surfing experience.
How to do:
- Have fewer tabs open at once, especially when you read online magazine sites, which tend to have heavy pages (ads, flash queries, etc.)
- Make sure to regularly remove browser extensions that you rarely use.
- Clear browser cache, cookies, plug-ins, and history. This can also free up much hard disk space. See this guide for how.
- Get rid of Adware (flash ads), this article from the Boyce Blog is worth a glance.
- Safari tends to eat up more RAM as time goes by, but a simple quit and restart will help it get back to “normal.”
- Reinstall your web browser if necessary.
Method 6: Identify and knock out heavy apps/processes with Activity Monitor
- Time: 15 minutes
- Effectiveness: Moderate
When to use: your Macbook starts to run slower after opening several applications, but you have no idea which application is the culprit.
Why it helps: Activity Monitor is a task manager on Mac that shows you both running applications and inactive processes. The list allows you to have a clear understanding of which one is devouring too many system resources (CPU, memory, disk, network, etc). Once you find the culprit, you can also use Activity Monitor to quit or force quit the app/process easily.
How to do: see this video.
Method 7: Reset SMC and NVRAM to fix odd hardware errors
- Time: 30 minutes
- Effectiveness: Moderate-High
When to use: your Macbook Pro acts oddly (it takes forever to figure out which disk to boot from, it’s slow to shut down, the fan is running non-stop, screenshots are not adjusting correctly, battery indicator lights are behaving incorrectly, etc.), and overall your Mac performs poorly.
Why it helps: NVRAM (or PRAM in older Macs) stores certain settings in a location that macOS can access quickly. SMC has roles in controlling thermal and power management on Mac. Resetting NVRAM and SMC helps resolve the issues mentioned above, and it’s a safe thing to do.
How to do: check out this video for how to properly reset NVRAM and SMC.
Method 8: Update your Macbook Pro to latest macOS version
- Time: 1-2 hours
- Effectiveness: Moderate
When to use: your Mac is still running an older macOS version (e.g. Catalina), and you meet the basic requirements of the new upgrade — latest macOS 12 Monterey, you need at least 26GB-44GB of available storage.
Why it helps: a newer macOS version typically runs faster than an older one, though it depends on the model of your Mac machine.
How to do: there are a few things you need to check before getting ready to update your MacBook to macOS Monterey. For example, check whether your model is compatible, whether you have enough storage space, and most importantly backup your data, etc.
Method 9: Disable fancy features in exchange for performance
- Time: 15 minutes
- Effectiveness: Low-Moderate
When to use: best for those who are using an older Mac with limited hardware configuration, and don’t particularly favor fancy interfaces and visual effects.
Why it helps: by disabling or turning off features like Notifications, Transparency, and Animations, Magnification, File Vault, etc., you can boost Mac performance since fewer system resources will be used.
How to do:
- Reduce Transparency and Animations.
- Minimize windows using and change the Genie Effect to Scale Effect.
- Optimize Notification center and turn off real-time notifications you don’t need.
- Disable Launchpad effects.
- Get rid of system preferences panes. Go to System Preferences (System Settings on macOS Ventura and above), locate a pane you want to remove, right-click (or Control-click), then remove it from the pop-up menu. It may ask you to type the admin password.
- Disable FileVault Disk Encryption option.
Method 10: Upgrade hardware (RAM, SSD) to have a real boost
- Time: it depends (at least 2 hours)
- Effectiveness: High
When to use: you are using an old Macbook Pro, and you’ve tried every method you can to fix your slow Mac but it’s still slow.
Why it helps: adding more memory (RAM) or replacing your HDD (hard disk drive) with a new SSD (solid-state drive) will give your Mac a real boost in performance. The only con is the upgrades can be pricey.
How to do:
Note: whether you choose to upgrade RAM or SSD, you’ll need to open the bottom case of your MacBook, a screwdriver may worth adding to your shopping cart as it will help you remove the screws much faster.
Add extra RAM: depending on your MacBook model, the RAM that best fits may be different. Learn more from our review here. It’s best to also check out this page to see memory specifications for your Macbook Pro model. It comes with an illustrated guide on how to replace the memory. This video is also worth checking out.
Upgrade to an SSD: If you still want to use your old MacBook Pro for professional work (video/graphic editing, 3D modeling, etc.), the best option is to replace the hard drive with a speedy SSD, see our picks here. Once you purchase your desired SSD, watch this video for how to install it step by step.
Do the New Apple Silicon Chips Solve the Slow Mac Issue?
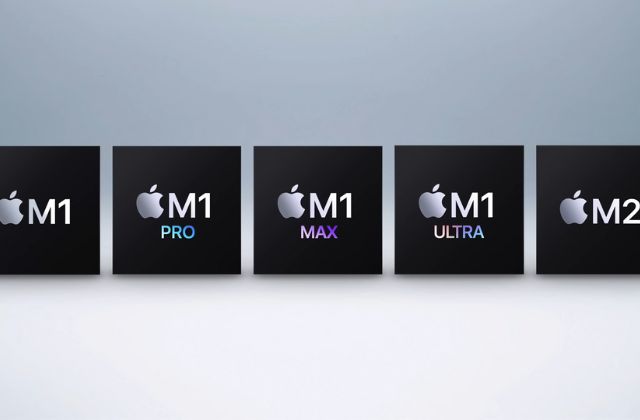
Apple has revolutionized the world of computing by transitioning its Mac lineup from Intel processors to its custom-designed Apple Silicon chips. As expected, this exceptional switch has increased performance, efficiency, and innovation.
The switch to Apple silicon chips offers a more integrated and seamless user experience. Does this mean that the slow Mac issues has been resolved?
The chips’ lower thermal footprint allows for passive cooling solutions in some models, eliminating the need for noisy fans while maintaining excellent performance. The efficiency solutions result in lesser need for applying stress on hardware for optimum results.
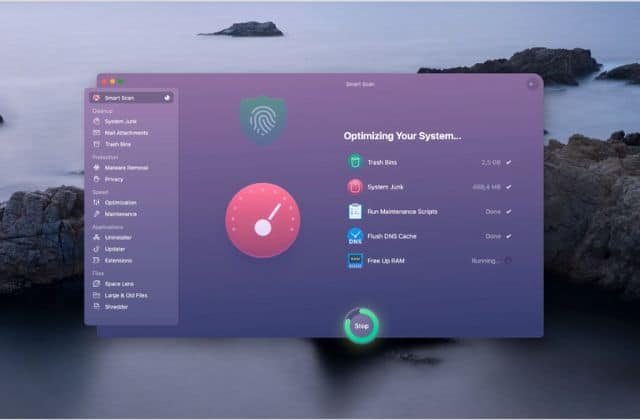
Even after all of this, some Mac users who use heavy software or multitask with needy applications face the issues of slow machines. In that case, you can use CleanMyMac software. It helps with the new Silicon chip machines as well by clearing up your RAM, handling maintenance scripts, and allowing other tweaks to restore your Mac’s speed.
If you’re experiencing sluggish performance with certain applications that still run as Intel binaries on your M1 Macs, there’s a simple solution to address this issue. While some apps automatically switch to Universal when updated, others may not, leading to a less than optimal experience on your Apple Silicon device.
Take, for example, Chrome – you noticed it was disturbingly slow. Although you attempted to update it, it remained as an Intel binary. To resolve this, you had to uninstall Chrome and then reinstall a fresh binary to fully leverage the speed boost offered by Apple Silicon.
When dealing with this situation, it’s essential to back up your settings and manage licenses before proceeding with the uninstallation of the Intel application. Nowadays, most downloads directly offer M1 native applications, but it’s wise to double-check the distribution site to ensure you’re obtaining a Universal or Apple Silicon-based binary.
Following these steps should suffice. By updating Intel-based applications that were causing frustration, like Chrome, you’ll be delighted to witness a significant improvement in performance. The slight additional effort required for system maintenance is undoubtedly worth the enhanced user experience.

However, it’s worth noting that not all applications have Apple Silicon binaries available. In such cases, you may have to accept the limitations or consider reaching out to the developers and requesting a port to be made specifically for Apple Silicon.
The transition to Apple Silicon has also sparked a wave of innovation in the Mac app ecosystem. Developers are increasingly optimizing their software to take advantage of the new architecture’s capabilities, resulting in faster, more efficient, and feature-rich applications. Additionally, new apps are being designed exclusively for Apple Silicon, leveraging the full potential of these cutting-edge chips.
How to Fix a Slow Macbook Pro: The Quick Technique (5-10 minutes)
The manual methods can be quite time-consuming to implement and may require you to have a certain level of technical skills. Fortunately, we’ve got two awesome Mac optimization apps that can save you time fixing your slow Mac.
Option 1: Using CleanMyMac X to scan & clean up your MacBook Pro
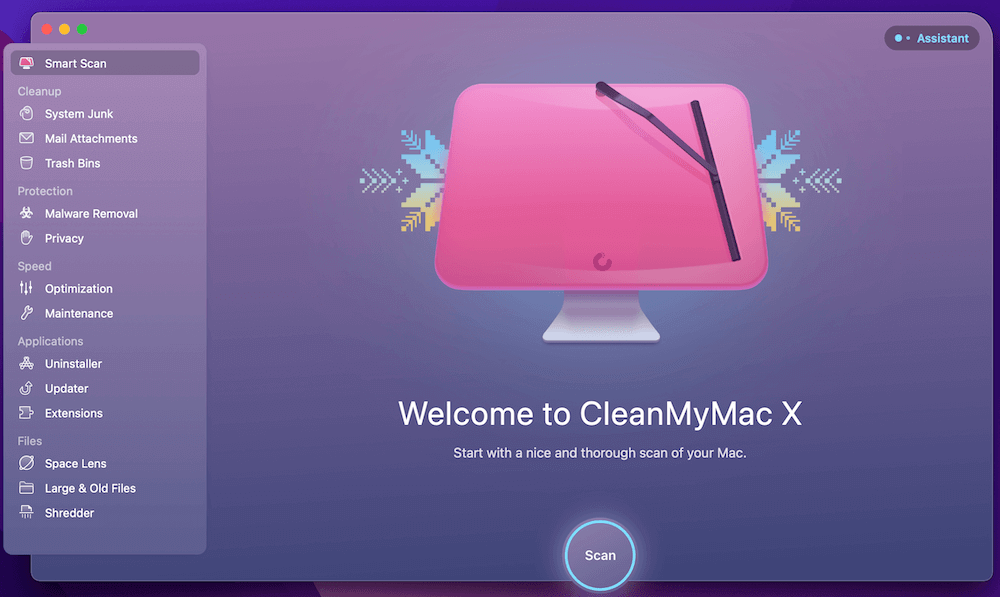
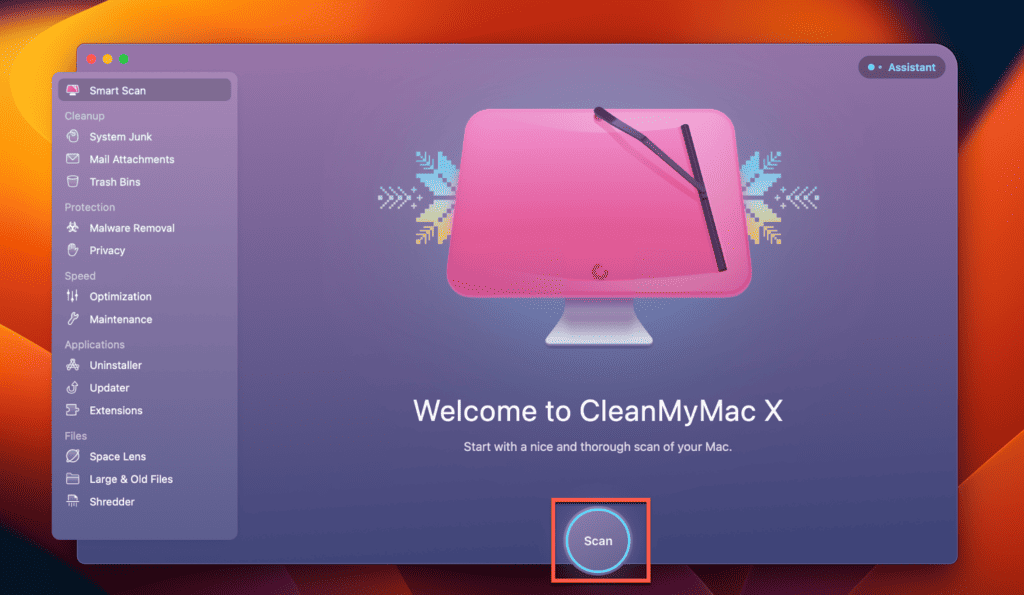
CleanMyMac X – an app developed by MacPaw and is rated as the best Mac cleaner software. As its name indicates, this app aims to help you clean your Mac and free up more storage space to optimize storage. It does this by locating junk and unnecessary files via analyzing your macOS system: Photos, Mail attachments, large and old files, etc. In addition, you can use the app to batch uninstall unwanted programs, and permanently erase files that are private to you. CleanMyMac is super sleek and intuitive, just hit Scan to get started and then Clean to fix issues.
Option 2: Using MacBooster to improve your Mac’s overall performance
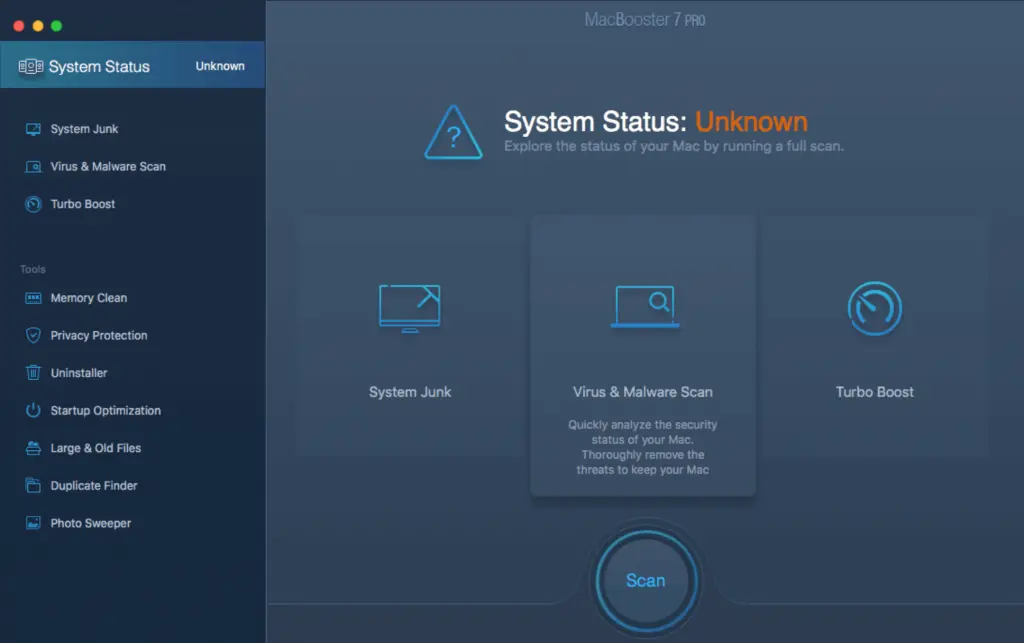
MacBooster – an app developed by the IObit team. This app stands out for its all-in-one concept. It includes a handful of useful utilities that can monitor the overall status of your Mac system. The Virus & Malware Scan module, for example, helps identify possible security threats and removes malware. To get started, simply run a quick System Status scan and it will find and suggest fixes. You can also move on to the Tools sections for further optimization.
Tips to Avoid Mac Running Slow
- Shut down your Mac when you are away. Restart regularly.
- Do not save everything to the desktop or the main drive (where your system files are stored). A full boot volume can lead to a slow startup and other performance issues.
- Try not to install third-party apps that you don’t need. They can take a lot of precious space as well as system resources while running. Also, outdated apps can have problems running due to macOS incompatibility. Learn how to uninstall Mac apps the right way.
- Use a lightweight browser like Safari or Chrome, Firefox tends to slow down over time (Safari or Chrome acts up too, sometimes). Avoid opening too many tabs at once while you are browsing the web, try not to install too many extensions/plugins.
- Clean up the hard drive (especially when the startup disk is almost full) on a regular basis, e.g. once a month. You can do this manually, or use a tool (like the ones we recommend above).
- Always keep your software up-to-date if possible, ideally, you should always install apps from App Store or the software provider’s official website, instead of third-party download sites which may bundle Adware or malware.
- If you regularly use your MacBook Pro for work at an office, consider elevating it with a laptop stand or a cooling pad as this helps avoid overheating issues.
- Don’t immediately update your Mac to the latest macOS version (to date, it is macOS 11.0 Big Sur). Let the early birds test out first, then choose to update when you feel it’s the right time.
- Don’t blame your Mac when it’s slow. Figure out the reason first and fix it right away. You never know when a small issue can evolve into a serious one.
Any Questions?
Do you find the information and techniques we’ve shared above helpful? Did you manage to tune up your MacBook even a little bit? We’d like to hear from you, contact us and let us know.
Fair disclosure: we are just normal loyal Mac fans like you. We don’t claim ourselves to be Mac experts, nor have we ever worked for Apple. All the information shared here is merely a walk-through of the knowledge and experience we’ve used to resolve our own Macbook Pro performance issues. Due to the complexities of the subject matter, your results may vary. Also, some of the recommendations contain third-party affiliate links. If you decide to purchase one of them, we will receive a commission for the sale, part (if not all) of the earnings will be used to maintain this site, for example, paying for the domain and hosting services. Nonetheless, we recommend them because we use the tools with our Mac machines and find them truly great. Make sure you only use what works for your issue, and don’t over-spend on things you don’t need.
- Skype Can’t connect on MacBook Pro – Fixes and Troubleshooting
- How To Uninstall Origin on Mac – Complete Removal Guide
- Microsoft Publisher for Mac – Possible? Top Alternatives in 2024
- Unable to Verify Account Name or Password Apple Mail [Fixed]
- How to Uninstall Logitech G HUB Mac – Step-by-Step Guide
This page was last updated on August 22, 2023.
