


This site contains affiliate links. As an Amazon Associate, We earn a commission from qualifying purchases at no extra cost to you.
In some cases, the screen on your Macbook Pro simply isn’t big enough to adequately view everything you’re doing.
So, you may decide to connect an external monitor to extend your viewing macbook screen and make you more productive.
To connect a display to your Mac, you need the right adapters and have to configure your display settings.
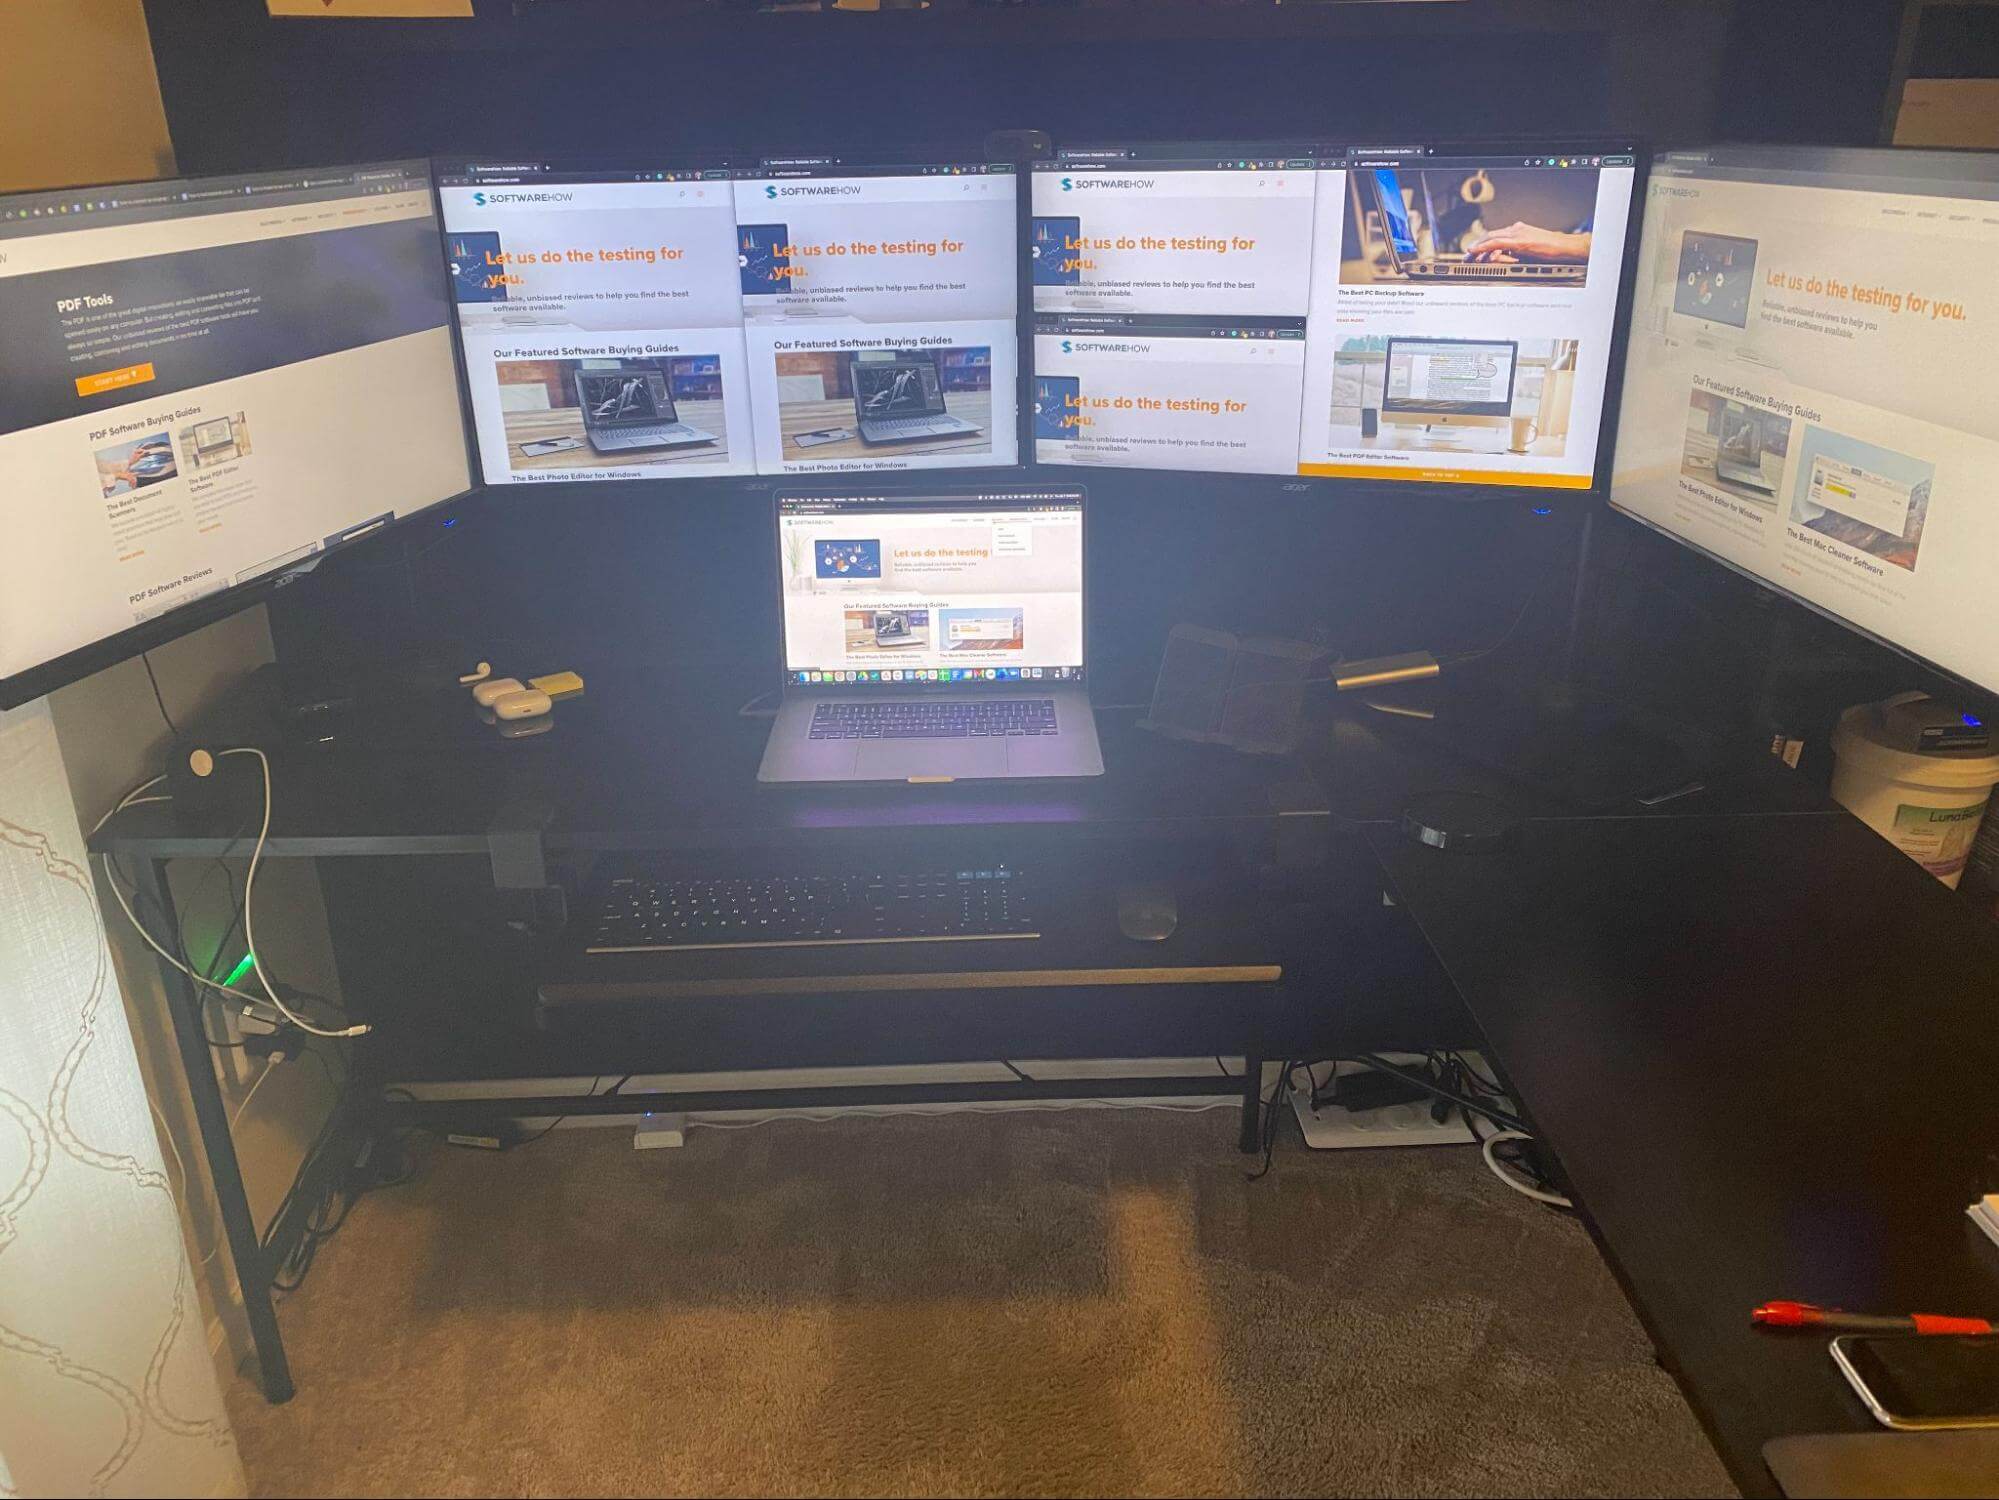
I’m Jon, an experienced Apple product owner. I’ve been using Apple products for over 10 years and currently own a 2019 MacBook Pro connected to 4 external LCD monitors & my iPad for a total of 6 displays (including the Pro’s built-in display).
Connecting external monitors is reasonably straightforward, but there are a few tips and tricks you should know.
If you’re trying to connect an external monitor to your Macbook Pro, stick around for my quick how-to guide!
How to connect an external monitor to MacBook a pro?
To connect your external monitor to MacBook Pro, connect a VGA display or projector to a Thunderbolt port on your MacBook Pro using a USB-C VGA Multiport Adapter. Connect an HDTV or HDMI display: Connect a wire straight to the HDMI port on your 14-inch or 16-inch MacBook Pro from your HDMI display or HDTV.
How to connect an External Monitor on Mac or Mac Mini [Step by Step Process]
Step 1: Get the Right Adapters
The first step in connecting an external monitor(s) to your Macbook Pro requires the right adapters. So, it’s essential to choose the right adapters specific to your computer. The right adapters are different from one Mac computer to the next.
For example, consider a 2019 16-inch Macbook Pro like I have. You’ll use its Thunderbolt ports for video output to connect to external monitors.
If you want to connect a VGA display or projector, use a USB-C VGA multiport adapter.
Or, if you want to connect the computer to an HDMI display or HDTV, use a USB-C to HDMI adapter to connect.
If you want to connect a USB-C display, simply connect the display to one of the Thunderbolt ports on the Macbook with a USB-C cable.
Again, the correct adapter varies based on your particular computer. Check with Apple’s guidelines on connecting to external monitors specific to your computer if you’re not sure.
In some cases, you may not need an adapter.
For example, a 2021 Macbook Pro has a built-in HDMI ports which allows you to connect directly to HDMI without an adapter.
Step 2: Plug the Displays into Your Macbook Pro
The next part is easy once you have the correct adapter for your computer and intended use. Connect the display to power, then connect it to your Macbook Pro.
If the one external display doesn’t display after connecting it, there are a few things to try. First, try to connect the display while the Macbook is turned off, then switch the laptop on.
If that doesn’t work, ensure all cables are firmly connected and the software is up to date.
Alternatively, use the Detect Displays button to trigger the Mac to see the external monitor.
To find this button, click on the Apple logo icon located on the top left corner of your screen, select System Preferences (System Settings on macOS Ventura and above) > Displays, then press the option key to bring up the Add Display button.

Step 3: Configure Your Displays in System Preferences
After you plug the displays into your Macbook, your next step involves configuring the new additions in your System Preferences (System Settings on macOS Ventura and above).
Drag the Displays to the Proper Locations
To see your display configuration options, go to ‘System Preferences (System Settings on macOS Ventura and above).’ You should be able to find this via the toolbar shortcut, but you can also use Spotlight Search to find it as well.
Once you’re on the ‘System Preferences (System Settings on macOS Ventura and above)’ page, click on ‘Displays,’ then you can move around the displays.

At this point, you can drag the boxes to manipulate how the monitor displays the screen. Once you click and hold on a display representing, you can drag it into the position that represents its physical location.
The display you select will show a red border to help you identify which display you’re moving.
It may take a few tries to get it right, especially if you’re using multiple displays.
Reconfigure Main Display
Next, you need to reconfigure the main display. If you’d like to use the external monitor as an extension of your Macbook instead of mirroring what you see on the screen, check the ‘Extend Display’ setting by right-clicking the display.
Ensure the ‘Mirror Display’ box isn’t checked.

Check the “Mirror for…” option if you want a mirrored view of your Macbook Pro built-in screen or another monitor, for example.
To make the switch more accessible, you can use the display options in the menu bar.

This allows you to turn the mirroring function on and off quickly.
Change Rotation
Lastly, adjust the rotation as necessary. For instance, if you’re using a vertical monitor (portrait orientation), you’ll need to change the settings to match.

You can find these settings within the ‘Rotation’ menu, where you can also change color and brightness. And also you can follow this process on two monitor setups.
How Many Displays Can You Connect to a Macbook Pro?
The number of displays or external monitors you can connect to your Macbook Pro hinges on the particular model. Or, more specifically, the chip you have.
According to Apple, you can plug in up to three external displays with a 14-inch Macbook Pro (2021 model) and up to four displays with a 16-inch Macbook Pro (2021 model).
More Displays with External GPUs
An external GPU, also known as an eGPU, can boost the number of displays you can connect beyond what Apple specifies.
If you use highly demanding applications on your computer, such as CAD programs, graphic design software, or do lots of 4K video editing, an eGPU may be a good idea.
They essentially allow you to connect extra external monitors and displays, including powerful 4K monitors.
For example, I have my 2019 Macbook Pro connected to four 27-inch Acer displays via a USB-C dock to two displays and a USB-C eGPU from Startech.com for the other two displays.
And if your USB not showing up on mac then you can follow simple steps to solve the issue.
More Displays with Your iPad
If you have an iPad, you can use it as an additional display for your monitor.
It works like any second display, allowing you to extend your desktop and view different apps or windows on the iPad.
It even works as a 6th display in my setup.

Conclusion
If a single monitor isn’t cutting it for your needs, whether you’re using demanding apps or simply need more space to view everything, you may consider adding a second (or third or sixth) monitor.
The process isn’t complicated, but it will take a bit of time. With a few minutes of your day and a few adjustments, you’ll be up and running in no time!
How many monitors do you use with your MacBook Pro? Do you have any issues connecting them? Leave a comment below and let us know.
About Jonathon Jachura