


This site contains affiliate links. As an Amazon Associate, We earn a commission from qualifying purchases at no extra cost to you.
Wondering how to uninstall Adobe Creative Cloud on your Mac? A quick method is to simply drag the app to the Bin—but this isn’t the full solution.
Sometimes, software intricacies or user preferences necessitate a more thorough removal process.
Whether you’re making space, troubleshooting, or simply decluttering, understanding the reasons behind an incomplete uninstall can be quite enlightening.
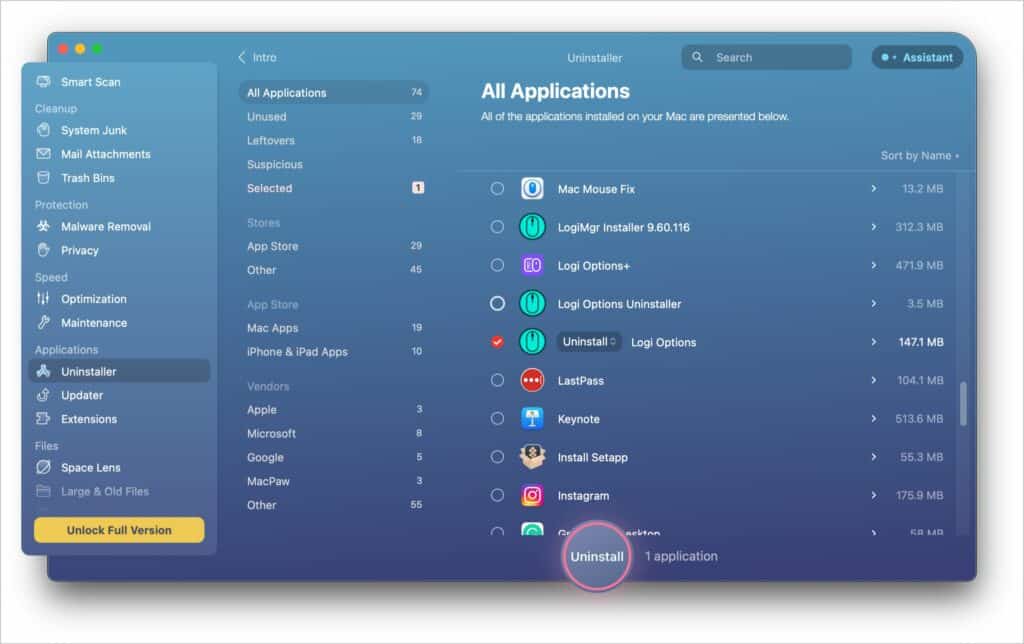
Is Adobe Creative Cloud taking up too much space on your Mac, and you need to uninstall it? If so, it’s time to download CleanMyMac. This third-party software makes uninstalling any app or software a breeze, allowing you to enjoy a stress-free computing experience.
How to Uninstall Adobe Creative Cloud on Mac: The Quick Answer

To quickly uninstall Adobe Creative Cloud from your Mac, navigate to the Applications folder, locate the Creative Cloud app, and drag it to the Bin. Finally, empty the Bin to complete the removal.
While this method provides a swift solution, it might leave behind some residual files. To ensure a thorough cleanup, we’ll dive deeper into the uninstallation process in the following sections.
But before doing that, let’s see why you may need to uninstall Adobe Creative Cloud from your Mac and what to do before the uninstallation.
Why Do You Need to Uninstall Adobe Creative Cloud on Mac?
Adobe Creative Cloud (CC) offers a suite of powerful creative tools, but there might be several reasons you’re considering its removal from your Mac. Here are the most common reasons to uninstall CC on your Mac:
- Freeing up Space: Adobe CC and its associated applications can occupy a significant amount of storage. Uninstalling can free up precious space, especially on devices with limited storage capacities.
- Software Conflicts: At times, Adobe CC might conflict with other software or even with Mac’s OS, leading to system slowdowns or application crashes. Removing it temporarily can help in identifying the root of such conflicts.
- Migration to a New Application: Maybe you’ve found another software that better suits your needs, or you are switching to a different version of an Adobe product.
- Troubleshooting: On occasion, the best way to resolve an issue with an application is to uninstall and then reinstall it. This ensures any corrupt files or configurations get refreshed.
- Subscription Changes: If you’ve decided not to renew your Adobe CC subscription or switch to another Adobe package, uninstalling the current suite might be necessary.
- Decluttering: Over time, we accumulate numerous applications on our devices. Periodically, it’s a good idea to remove those that are no longer in use to keep the system optimized.
Regardless of the reason, it’s crucial to uninstall software, especially comprehensive suites like Adobe CC, correctly to ensure your Mac remains efficient and clutter-free.
What to Do Before You Uninstall Adobe Creative Cloud on Mac

Before you dive into the uninstallation process of Adobe Creative Cloud (CC) on your Mac, it’s imperative to take a few preparatory steps. This ensures a smooth removal and safeguards important data.
Here’s what to do before you uninstall Adobe CC on your Mac:
- Backup Important Files: Ensure you’ve backed up all essential files, projects, and assets associated with Adobe CC applications. This could be your Photoshop projects, Illustrator designs, Premiere Pro video edits, and so on.
- Synchronize Creative Cloud Files: If you use Adobe’s cloud storage, make sure all your files are synchronized because you may lose unsynced files. Open the Creative Cloud desktop app and check the syncing status to confirm everything is up-to-date.
- Ensure Stable Internet Connection: If you’re planning to use Adobe’s official uninstaller, a stable internet connection is crucial as the process might require verification.
- Close All Adobe Applications: To prevent any hiccups during the uninstallation, close all running Adobe applications. This includes background processes; you can use the Activity Monitor on your Mac to ensure no Adobe processes are running.
- Remove Creative Cloud Applications: Before proceeding, make sure to delete all Creative Cloud applications like Photoshop, Illustrator, and Premiere Pro from your device. Only then can you remove the Creative Cloud desktop app.
- Deactivate Adobe CC License: Before uninstalling, it’s a wise move to deactivate the Adobe CC license from your Mac. This ensures you can easily activate the license on another device if needed.
- Update Your System: It’s always a good practice to keep your macOS updated. Sometimes, system updates can resolve software conflicts without needing to uninstall applications.
- Check Admin Rights (For Enterprise Users Only): As an Enterprise user, you might lack the necessary rights to uninstall apps. If so, reach out to your system administrator.
Now, with these precautions and preparations in place, you’re ready to proceed with the uninstallation of Adobe Creative Cloud from your Mac. Let’s get started!
Step-by-Step Tutorial to Manually Uninstall Adobe Creative Cloud on Mac
Here’s a detailed step-by-step guide to manually uninstall Adobe Creative Cloud on your Mac:
Step 1: Quit Adobe Creative Cloud
- Using the Dock: If the Adobe Creative Cloud app is running, right-click its icon in the Dock and select Quit.
- Using Activity Monitor: To ensure all related processes are terminated follow these steps:
- Open Finder and select Applications > Utilities.

- Double-click Activity Monitor in the Utilities folder.

- In the search bar at the top-right, type Adobe to filter the processes.

- If any Adobe processes are listed, select them one by one and click the X button in the top toolbar to quit them.

Step 2: Uninstall Apps in Adobe Creative Cloud
Before you uninstall Adobe CC itself, you’ll want to remove the individual applications within it. Otherwise, you’ll get the following error message:

To avoid this hiccup, follow these steps to uninstall all apps in Adobe Creative Cloud:
- Launch the Adobe Creative Cloud app.
- Click the All Apps tab in the top left corner.
- You’ll see all Creative Cloud apps in the right pane, including the ones you’ve installed on your Mac.
- For each installed app (like Photoshop, Illustrator, etc.), click the three dots (…) next to the app’s name and select Uninstall from the menu.
- Follow the on-screen prompts to complete the uninstallation for each app.
Step 3: Uninstall Adobe Creative Cloud
Once all individual apps are uninstalled, you can move on to uninstall the Adobe Creative Cloud app. Here are the steps to follow:
- First of all, get the appropriate uninstaller for your macOS version by clicking one of the following links:
- After downloading the uninstaller, open your Downloads folder and double-tap the file named Creative_Cloud_Uninstaller.dmg.

- On the next window, double-click the Creative Cloud Uninstaller again.

- If prompted due to your security settings, choose Open to run the uninstaller from the opened DMG file.

- Enter your admin username and password.
- You’ll get a small pop-up window with two options. Select Repair if you think it will resolve your issue and you won’t need to uninstall the Creative Cloud desktop app. Otherwise, click Uninstall.

- Once the uninstallation is complete, click Close.
Step 4: Remove Adobe Creative Cloud Related Files
Even after uninstalling, there might be residual files left behind. Here’s how to remove them:
- In the Finder menu, select Go and click Go to Folder.

- Type in the following path and press Enter:
/Library/Application Support/

- Search for any folders with Adobe in their name and move them to the Bin.
- Repeat the Go to Folder process and navigate to the following paths one by one and delete any Adobe-related folders:
~/Library/Application Support/
~/Library/Preferences/
/Library/LaunchAgents
/Library/LaunchDaemons
/Library/PrivilegedHelperTools
Finally, empty the Bin to ensure all files are completely removed.
And that’s it! You’ve manually removed Adobe Creative Cloud from your Mac. If you wish for an even deeper clean, consider using third-party cleaning tools. However, the above steps should suffice for most users.
How to Automatically Uninstall Adobe Creative Cloud on Mac
Uninstalling applications and their associated files manually can be time-consuming. If you prefer a quicker and more efficient approach, you can use third-party uninstallation tools to remove Adobe Creative Cloud (CC) and its related files automatically.
Here are some popular and effective uninstaller applications:
- AppCleaner: A simple and free application that helps users completely uninstall unwanted apps, ensuring that all hidden and associated files are removed.
- CleanMyMac X: Apart from its cleaning features, CleanMyMac X offers an uninstaller tool that ensures apps are completely removed, including their cached and associated files.
- AppZapper: With its drag-and-drop feature, it ensures when you uninstall an app, all its associated files are zapped away as well.
- iTrash: Known for its advanced algorithm, iTrash is efficient in detecting and removing files linked to an application, ensuring a thorough uninstallation.
- AppDelete: This app is designed to uninstall not just applications themselves but also widgets, preference panes, plugins, and screensavers along with their associated files.
- Osx Uninstaller: A lightweight program that can help users quickly remove unwanted apps along with all their remnants in just a few clicks.
Note: When using third-party uninstallers, always ensure to choose trusted software and read reviews before download. Additionally, keeping a backup of important data before performing any uninstallation is always a good practice.
What to do If You Can’t Find the Creative Cloud Uninstaller on Your Mac?
If you can’t locate the Creative Cloud Uninstaller on your Mac, it could be due to various reasons such as accidental deletion, a corrupted installation, or other unforeseen issues. Nevertheless, there are alternative approaches to uninstall Adobe Creative Cloud when the primary uninstaller is missing:
a. Reinstall to Uninstall
If you’ve accidentally deleted the uninstaller or there’s been some corruption in the installation process, you can fix it by reinstalling the Creative Cloud uninstaller. Once reinstalled, the uninstallation process can be smoother and more effective.
Follow these steps to reinstall the Creative Cloud uninstaller:
- Visit the official Adobe website and download the Creative Cloud installer.
- Run the installer and follow the on-screen instructions to install Adobe Creative Cloud.
- After reinstallation, the Uninstall Adobe Creative Cloud application should now be present in the Utilities > Adobe Installers folder.
- Follow the on-screen instructions to uninstall Creative Cloud.
b. Use Third-party Uninstaller Tools
As mentioned earlier, you can use third-party tools like AppCleaner, CleanMyMac X, or others, which can detect and remove applications and their associated files without needing the default uninstaller.
c. Contact Adobe Support
If you’re still encountering issues or are uncertain about the process, consider reaching out to Adobe’s customer support. They can provide guidance tailored to your specific situation.
d. Restore from a Backup
If you regularly back up your Mac using Time Machine or another backup solution, you can restore the Adobe Creative Cloud uninstaller from a previous backup where it existed.
Why Can’t You Uninstall Creative Cloud on Your Mac?
There could be several reasons why you might encounter difficulties when trying to uninstall Adobe Creative Cloud (CC) from your Mac. Here are some common issues and their potential causes:
- Incomplete Installation: If the installation of Creative Cloud was interrupted or not completed successfully, some of the essential files, including the uninstaller, might be missing or corrupted. This can hinder the regular uninstallation process.
- System Permissions: Sometimes, macOS’s security features may restrict changes to certain files or folders. This might prevent the uninstaller from removing all parts of the application.
- Active Background Processes: If any Adobe CC apps or related background processes are still running, they can interfere with the uninstallation process. It’s essential to close all Adobe-related processes before attempting to uninstall.
- Corrupted Uninstaller: Over time, or due to disk errors, the Creative Cloud uninstaller might become corrupted, rendering it non-functional.
- Conflicts with Other Software: Occasionally, other software or system utilities might interfere with the uninstallation process of Adobe Creative Cloud.
- User Account Restrictions: If your user account doesn’t have the necessary administrative rights or permissions, you might face difficulties in uninstalling software.
- Misplaced or Deleted Uninstaller: It’s possible that the Creative Cloud uninstaller was accidentally deleted or moved from its original location, making it unavailable when needed.
- Malware or Virus Interference: Although rare, malware or viruses can mess with system files and applications, including Adobe CC, preventing standard operations like uninstallation.
If you’re experiencing challenges in uninstalling Creative Cloud, it’s advisable to try different methods – be it manual removal, third-party uninstaller tools, or even reaching out to Adobe’s support for assistance.
It’s also crucial to ensure your macOS is updated, as some issues might be resolved with system updates.
Frequently Asked Questions
How do I access the Adobe Creative Cloud uninstaller on my Mac?
To access the Adobe Creative Cloud uninstaller on your Mac, navigate to the Applications folder, open the Utilities subfolder, then find and launch the Adobe Installers folder. Inside, you’ll see the Uninstall Adobe Creative Cloud application. Run it to begin the uninstallation process.
Can I uninstall Adobe Creative Cloud applications individually on Mac?
Yes, you can uninstall Adobe Creative Cloud applications individually on Mac. Open the Creative Cloud desktop app, go to All Apps, then click the three dots (…) next to the desired app. Select Uninstall from the dropdown and follow the on-screen instructions to remove the specific application.
After uninstalling Adobe Creative Cloud, can I reinstall it later on my Mac?
After uninstalling Adobe Creative Cloud from your Mac, you can reinstall it anytime. Simply visit Adobe’s official website, download the Creative Cloud installer, and follow the installation prompts. Your previous licenses and subscriptions will remain valid for reactivation.
Conclusion
You can uninstall Adobe Creative Cloud (CC) on a Mac manually and automatically. While the manual method requires attention to individual apps and residual files, third-party tools can streamline the process.
If the primary uninstaller is missing or corrupted, you can reinstall CC to access the uninstaller or opt for manual removal.
Sometimes, you may face issues during uninstallation stemming from incomplete installations, system permissions, or active Adobe processes. But if you follow the steps outlined in this article and ensure all Adobe-related processes are closed before uninstallation, you’ll be good to go.
Pro Tip: Regularly back up essential Adobe projects before uninstallation to prevent accidental data loss.
About Mohit